
If you’re craving a bit of green but short on space, a vertical garden DIY project could be your perfect solution.
A vertical garden DIY project using recycled materials could be your perfect solution! Not only does it save precious space, but it also helps you reuse everyday materials, cutting down on waste and benefiting the environment.
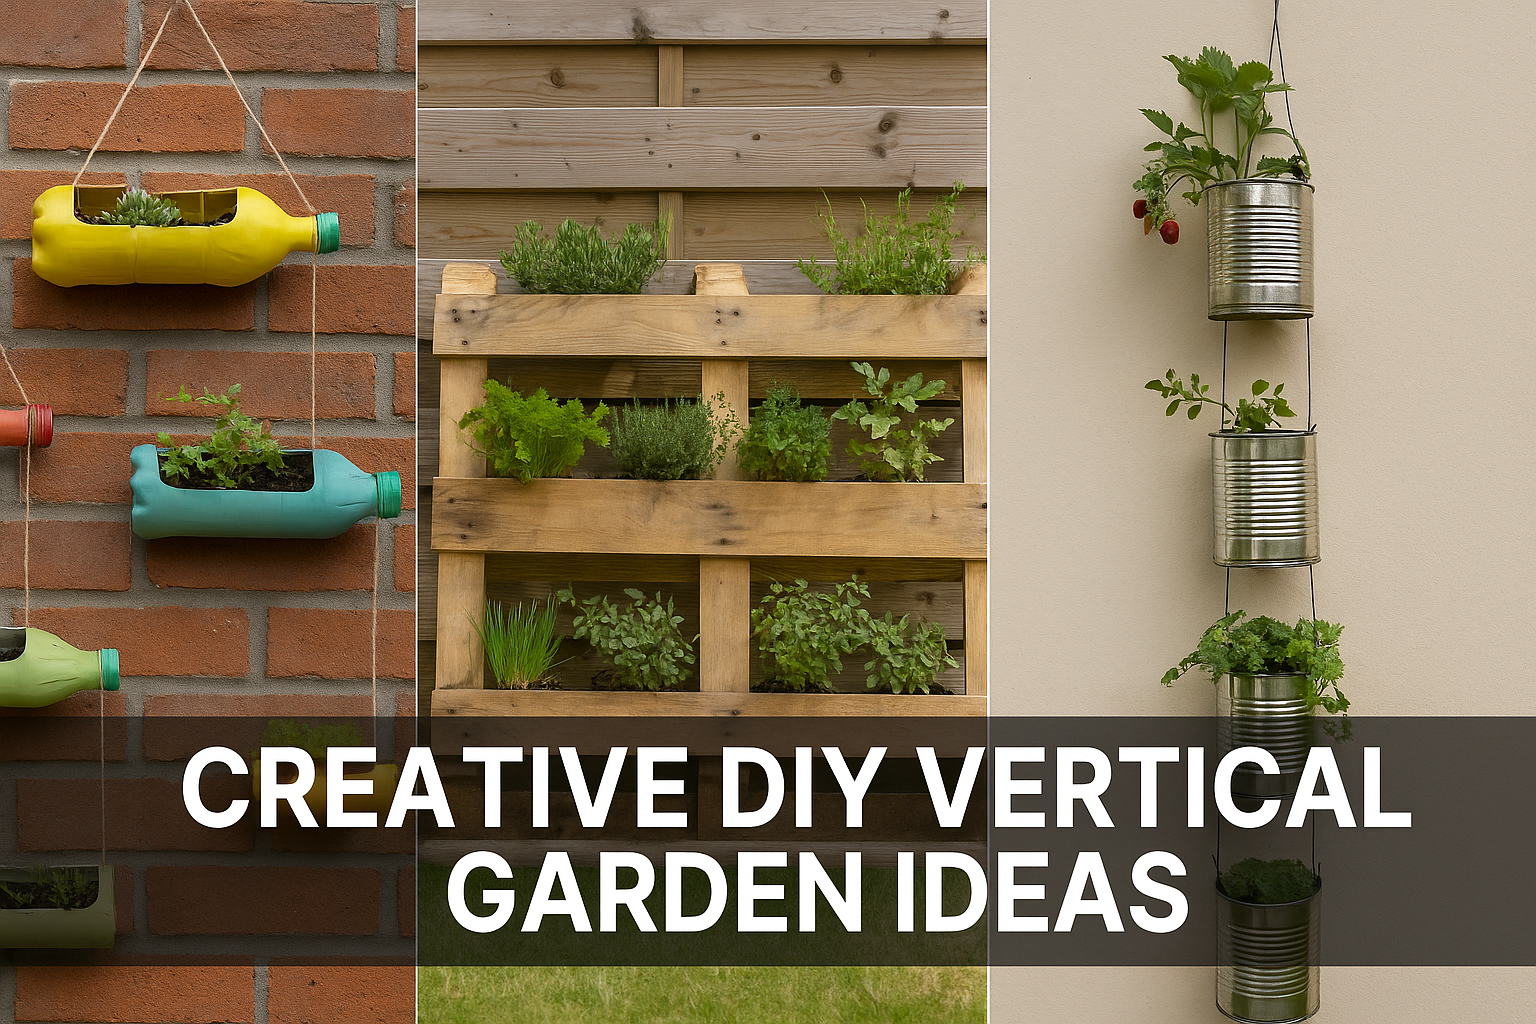
In this step-by-step tutorial, you'll learn to create stunning vertical gardens using plastic bottle planters, pallet gardens, and more.
Pro Tip: As you follow this guide, consider using visuals to help along the way. Snapping photos or making simple sketches of your progress (around 5-6 images/diagrams in total) can greatly enhance the project. Seeing each step will keep you motivated and ensure your vertical garden DIY adventure goes smoothly.
Why Choose a Vertical Garden DIY Project
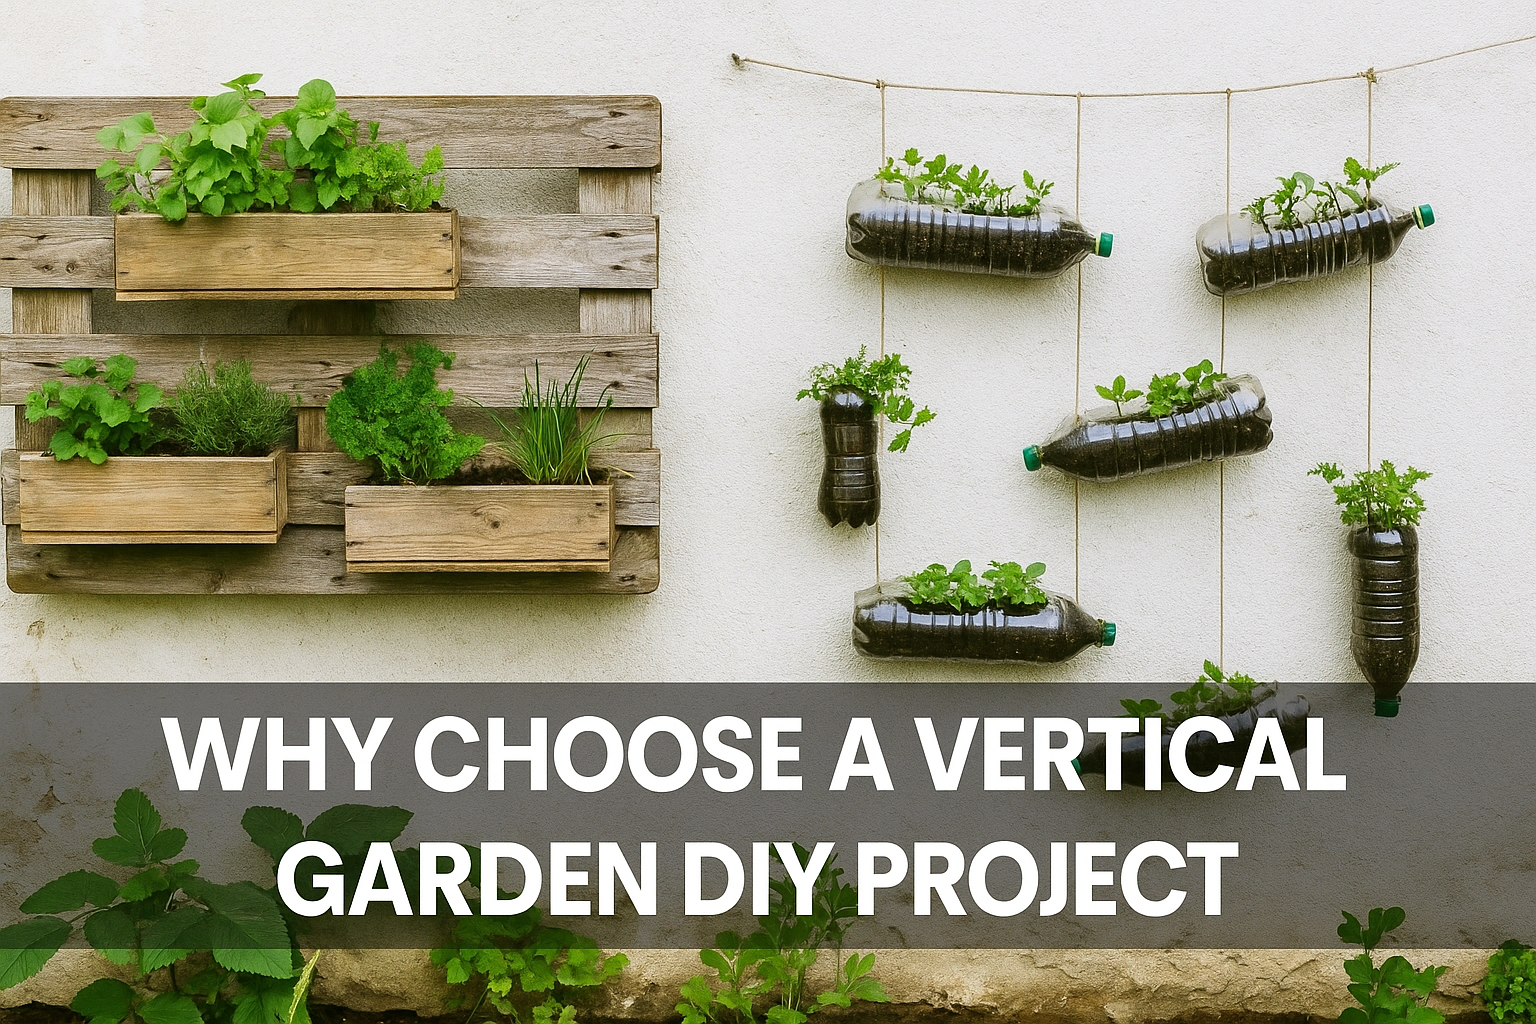
Why go for a vertical garden? For starters, a vertical garden DIY project is ideal when you have limited floor space. You can grow plenty of herbs or flowers upward on a wall, fence, or railing – fitting a garden into even a tiny balcony.
It’s also very cost-effective: this kind of garden is not only inexpensive but also environmentally responsible
By using upcycled planters (old bottles, cans, etc.), you practice sustainable, eco-conscious gardening and turn trash into treasure
On top of that, building your own vertical garden is just plain fun. It lets you exercise creativity and enjoy the satisfaction of growing your own herbs, veggies, or flowers at home.
No wonder vertical garden DIY projects are catching on among urban gardeners!
Also Read
Hacks: Top 11 Essential Tools For Make Your Gardening Easy
How to Grow and Care for Rubber Plants at Home – The Ultimate Indoor Guide
Materials You Can Recycle For Create a Vertical Garden
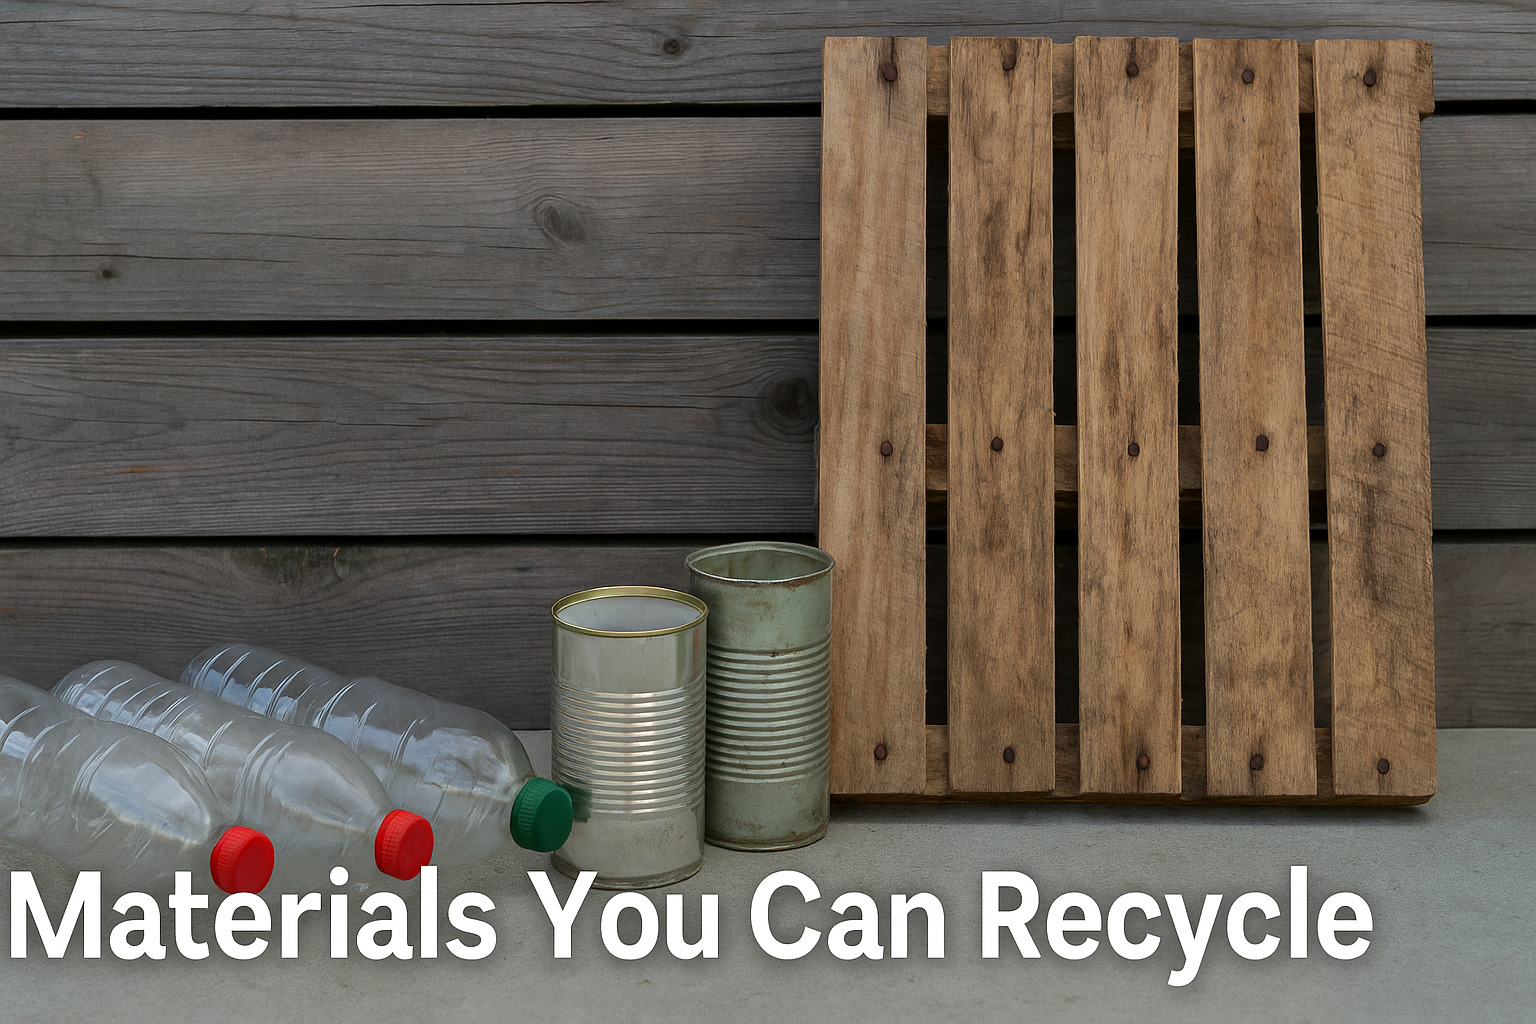
One of the best parts of this project is using materials you already have. You might be surprised how many everyday items can become upcycled planters.
Here are some common materials to recycle for your vertical garden:
- Plastic Bottles: 1-2 liter plastic bottles can be turned into handy hanging planters. With a few cuts and holes, a used bottle becomes a perfect mini pot for herbs or succulents. These plastic bottle planters are lightweight and easy to mount in rows or columns on a wall.
- Wooden Pallets: An old shipping pallet makes a rustic frame for a pallet garden. The slats can hold small pots or even soil directly (line the back with fabric first). Stand the pallet upright, fill it with greenery, and you’ve got a vertical garden that’s both decorative and functional.
- Tin Cans: Used tin cans (from food, coffee, etc.) are excellent small planters. Clean them, add drainage holes, and hang or nail them to a fence or board. Painted in fun colors, tin cans become charming upcycled planters for flowers or kitchen herbs.
- And More: Get creative – almost any sturdy container can work. People have used old PVC pipes, shoe organizers, and even bathtubs or refrigerators as planters
Tools and Supplies Checklist
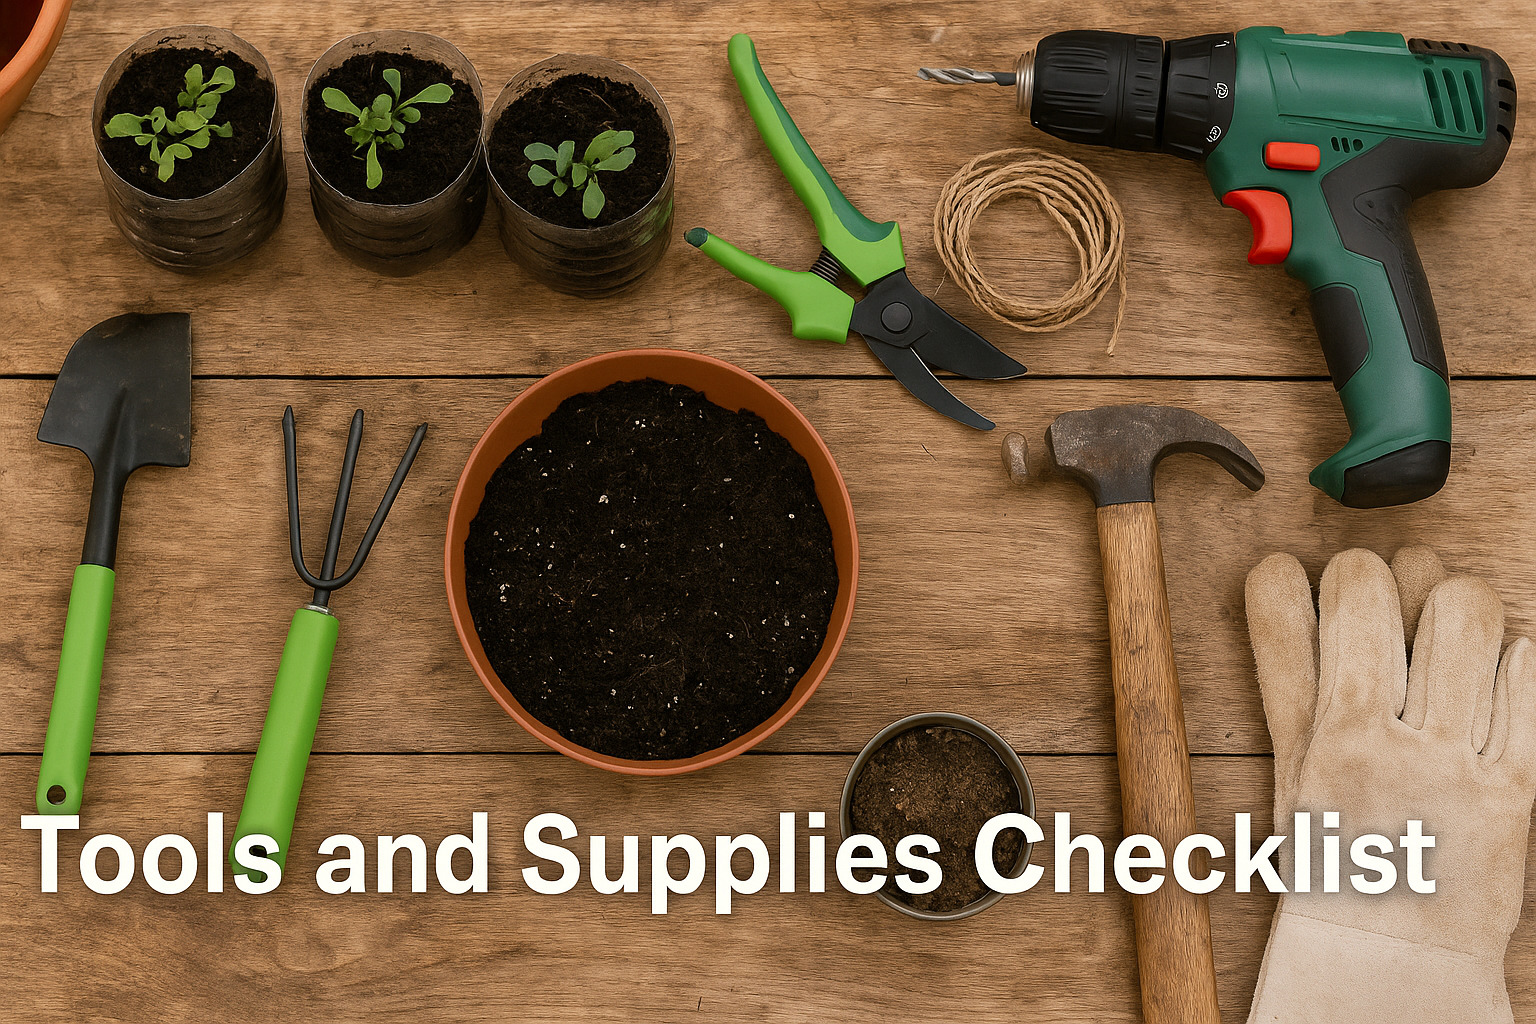
Gather these items before you start your vertical garden DIY build:
Tools:
- Scissors or utility knife (for cutting bottles or fabric)
- Drill (or hammer and nail) for making holes
- Hammer and nails/screws (to hang or mount planters)
- Strong twine or wire (for hanging planters)
Supplies
- Recycled containers (bottles, cans, pallet, etc. – cleaned and ready)
- Potting soil (lightweight, all-purpose mix)
- Plants or seeds (herbs, greens, succulents, or flowers that do well in containers)
- Hooks or brackets (to hang planters or support a pallet)
Step-by-Step Tutorial
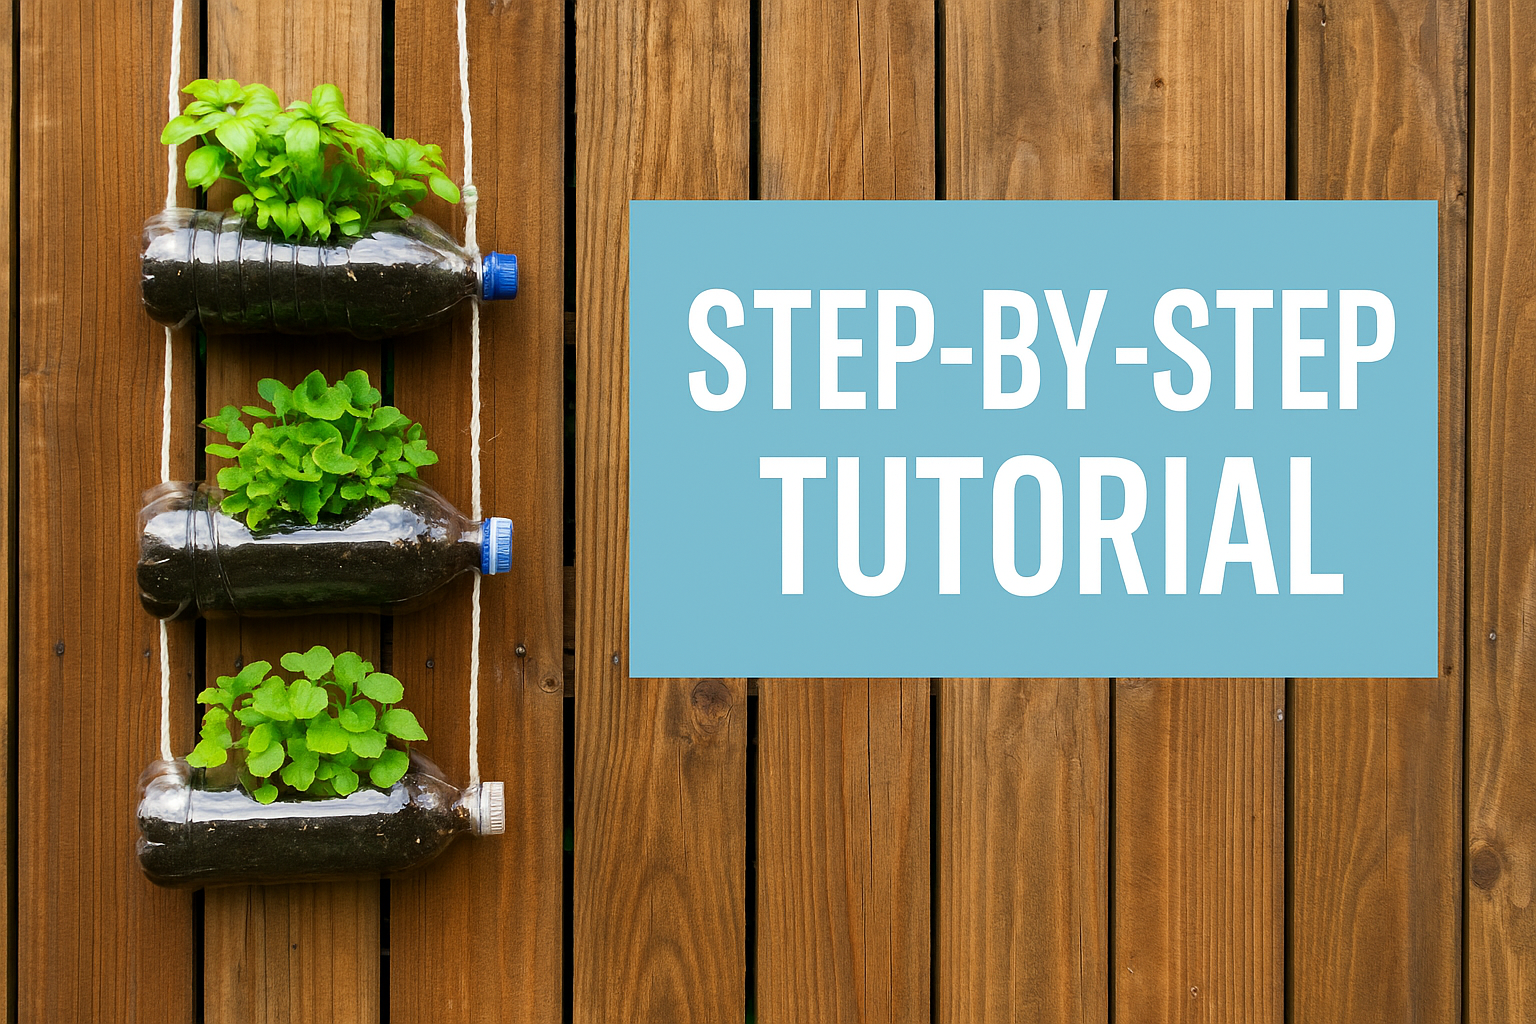
Follow these steps to create your own vertical garden using recycled materials:
1- Select Your Space:
Decide where your vertical garden will live. It could be an outdoor wall, balcony railing, or even indoors by a sunny window.
Make sure the spot gets enough light for your plants (around 4-6 hours of sun for most herbs and veggies.
Also ensure the surface can support your garden.
2- Prepare Your Materials
Next, prep your containers. Clean all bottles, cans, etc., and peel off labels. Do any cutting needed: for example, cut a rectangular “window” in the side of a bottle if it will lie on its side, or cut off the top of a bottle or can to open it up.
If using a wooden pallet, sand any rough spots and attach fabric to the back if you plan to fill it with loose soil.
3- Create Drainage Holes
Make sure each container has drainage so excess water can escape. Use a drill or a nail to poke a few small holes in the bottom of every bottle and can. (If a bottle’s cap will act as the bottom, put some holes in the cap).
4- Assemble the Framework
Hang or mount your planters securely on your chosen surface. For example, if you’re using hanging plastic bottles, thread a rope through two holes near each bottle’s top and hang them (you can even stack bottles by running the rope through one bottle’s bottom and the next bottle’s top).
5- Add Soil and Plants
Fill your containers with potting soil about two-thirds full. Then add your plants or sow your seeds.
If you’re transplanting seedlings, make a small hole in the soil and gently tuck each plant in.
For seeds, plant them according to the packet instructions (usually just beneath the soil surface).
Try to use plants that fit the container size – shallow-rooted plants like basil, mint, lettuce, or pansies do great in bottles and cans.
6- Maintain Your Vertical Garden
Like any garden, a vertical garden needs a bit of care:
- Watering: Water your plants regularly, keeping the soil moist but not soaked. In warm weather, small containers may need daily watering. Water until you see a little drip from the drainage holes, then stop. Small planters can dry out fast, so check them often.
- Sunlight & Feeding: Make sure your plants get the light they need. If one area of your garden is too shaded, move those plants or choose shade-tolerant ones there. Feed your plants lightly every few weeks – a diluted all-purpose fertilizer or compost tea works great to replenish nutrients.
- Pruning & Pests: Trim your plants as needed to keep them tidy and encourage new growth (for example, pinch back herbs regularly and enjoy the harvest!). As you prune, check for pests. If you spot aphids or other bugs, remove them by hand or spray the plants with a mild soapy water solution.
By following these maintenance tips, your vertical garden DIY will thrive and stay lush. Enjoy watching it grow!
Creative DIY Vertical Garden Ideas
Looking for inspiration to customize your project?
Here are a few creative DIY vertical garden ideas to spark your imagination:
- Colorful Bottle Wall: Paint several plastic bottles in bright colors and hang them in rows to create a cheerful living wall. Each bottle can host a different plant, making a vibrant patchwork of greenery.
- Herb Pallet Planter: Turn a pallet into a vertical herb garden by filling each shelf space with soil and planting different herbs in each. Prop it up near your kitchen for an attractive and handy herb display.
- Tin Can Cascade: Hang upcycled tin cans at different heights with twine or wire. Plant trailing greenery or flowers in them so that leaves and vines spill over the rims, creating a cascading green wall.
Feel free to get creative and put your own twist on these ideas.
The beauty of a recycled vertical garden is that there’s no single “right” design – use whatever you have and make it your own!
Top Recycled Materials for DIY Vertical Gardening
| Recycled Material | Ideal Use | Why It’s Great |
|---|---|---|
| Plastic Bottles | Herb towers, drip planters | Lightweight, easily available, ideal for vertical hanging systems |
| Wooden Pallets | Wall-mounted garden | Rustic look, strong structure, supports heavy pots |
| Old Buckets or Cans | Hanging or floor planters | Great drainage, upcycled charm, durable for outdoor use |
| Tyres | Stacked vertical planters | Unique shape, long-lasting, perfect for trailing plants |
| PVC Pipes | Vertical stack planting | Perfect for leafy greens and strawberries, great water flow |
Pro Tip: Combine multiple materials creatively for a unique and sustainable vertical garden setup tailored to your balcony or terrace space.
Troubleshooting Common Problems
Every DIY project has its challenges. Here are some common vertical garden issues and how to fix them:
- Overwatering Drips: If water is constantly dripping from your planters, you’re probably overwatering. Use less water or water more slowly so the soil can absorb it.
- Dry, Wilting Plants: If plants are wilting or the soil feels dry too often, water more frequently. In hot or windy conditions, small planters can dry out quickly, so check them daily.
- Unstable Planters: If a planter falls or feels wobbly, strengthen the support. Use sturdier hooks or add an extra tie to secure it. Always make sure heavy containers are firmly in place.
- Weak Growth: If a plant isn’t thriving (yellow leaves or stunted growth), it may need more sunlight or nutrients. Move it to a sunnier spot or give it a dose of organic fertilizer.
- Pests: If you notice insects like aphids or caterpillars on your plants, act quickly. Remove them by hand or spray the affected plants with an organic insecticidal soap.
By addressing these issues, you’ll keep your vertical garden healthy and beautiful. Each challenge is a learning experience – soon you’ll know exactly what your plants need.
FAQs
Can you make a vertical garden with plastic bottles?
Yes, plastic bottles are excellent for vertical gardens due to their durability and availability.
How do you build a pallet vertical garden?
Clean pallets thoroughly, create planting pockets, line them with fabric, and securely fix them onto walls.
What plants grow best in recycled vertical gardens?
Herbs, succulents, small flowering plants, strawberries, lettuce, and spinach are ideal.
How to maintain a recycled vertical garden easily?
Regular watering, occasional fertilizing, pruning, and pest control ensure easy maintenance.
How long do recycled materials last for vertical gardens?
With proper care, plastic bottles and pallets can last several years outdoors.
How do I make a vertical garden with recycled materials?
Start with items like plastic bottles, wooden crates, or PVC pipes. Arrange them vertically using ropes, pallets, or grills, and fill with soil and plants.
Can I use plastic bottles for gardening safely?
Yes, use BPA-free bottles or food-grade plastic. Make sure to create drainage holes and avoid overheating.
What plants grow best in a vertical garden?
Herbs (mint, coriander), spinach, lettuce, tulsi, strawberries, succulents, and trailing flowers like petunias work great.
Is vertical gardening good for small balconies?
Absolutely! It saves space, adds greenery, improves air quality, and is ideal for urban homes.
Conclusion
Embarking on a vertical garden DIY project is a rewarding way to bring more greenery into your life – and it helps the environment too.
You’ve learned how to build a vertical garden using recycled materials, so now it’s time to roll up your sleeves and give it a try.
Start small, use what you have, and enjoy the process.
Whether your vertical garden is a single hanging bottle or a whole pallet of plants, every bit of green makes a difference.


