.webp)
Indoor plant lovers and urban gardeners, don’t lose hope when your favorite foliage starts looking forlorn!
Even a plant that appears dry and “dead” may still have life in it and can start growing again with the correct care.
In this in-depth guide, we’ll show you how to revive your dying indoor plant step-by-step.
From diagnosing the problem to implementing wonderful tips to revive plants, you’ll learn everything needed to rescue your green companions.
Let’s dive in and turn your plant care woes into success stories!
Why Do Plants Die? (Identifying the Problem)
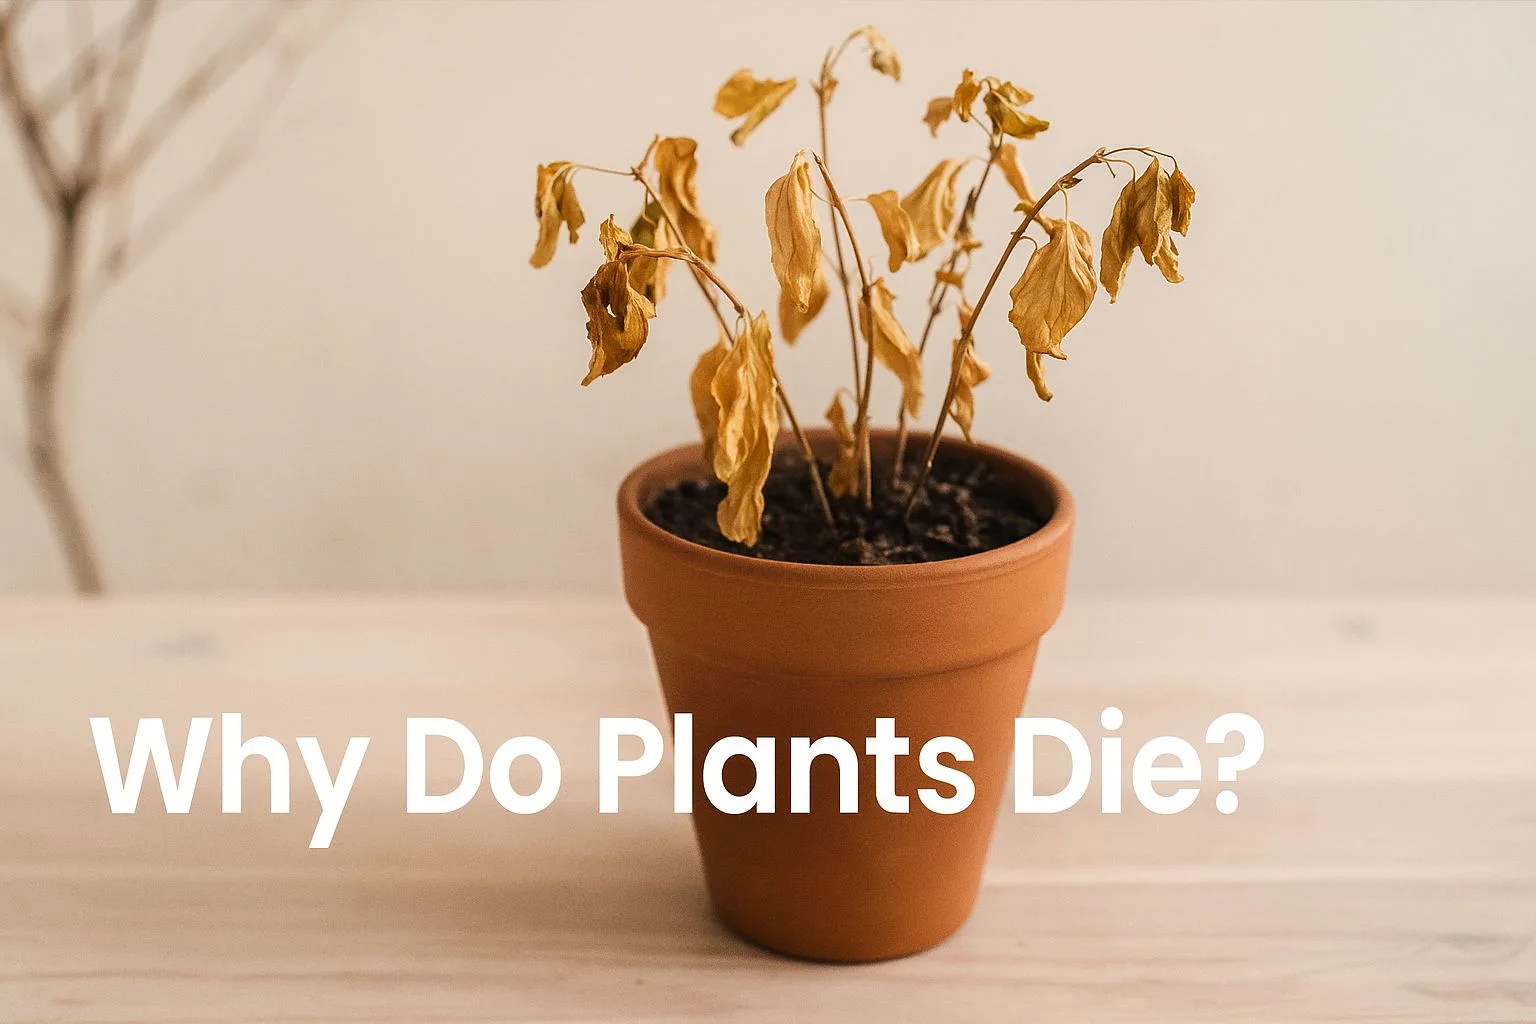
Before you can revive a dying plant, it’s important to understand why it’s struggling. Common reasons include:
1. Overwatering or Underwatering
Too much water can rot roots, while too little dehydrates the plant.
Overwatered plants often show yellowing, limp leaves, whereas underwatered ones have dry, crispy brown edges.
2. Insufficient Light
Plants in dark corners may grow weak, pale, or leggy.
On the other hand, too much harsh sun can scorch leaves.
3. Nutrient Deficiencies
Lack of nutrients leads to stunted growth, pale or discolored leaves, and weak stems. The plant slowly “starves” if the soil is exhausted.
4. Pests and Diseases
Tiny intruders like aphids, mealybugs, or fungal infections can sap a plant’s strength.
Holes in leaves, sticky residue, or spots indicate pest or disease issues.
5. Pot-Bound Roots
If roots have outgrown the pot (root-bound), the plant can’t get enough water or nutrients. It may wilt frequently and stop thriving.
6. Other Stresses
Changes in temperature, AC drafts, or pollution can stress plants. Indoor plants also suffer if dust covers their leaves (hindering photosynthesis).
Figure out the culprit behind your dying plant. Often, one issue (like overwatering) leads to others (like root rot disease).
Take a close look at the symptoms so you can apply the right fix!
Step 1: Check If the Plant Is Really Dead
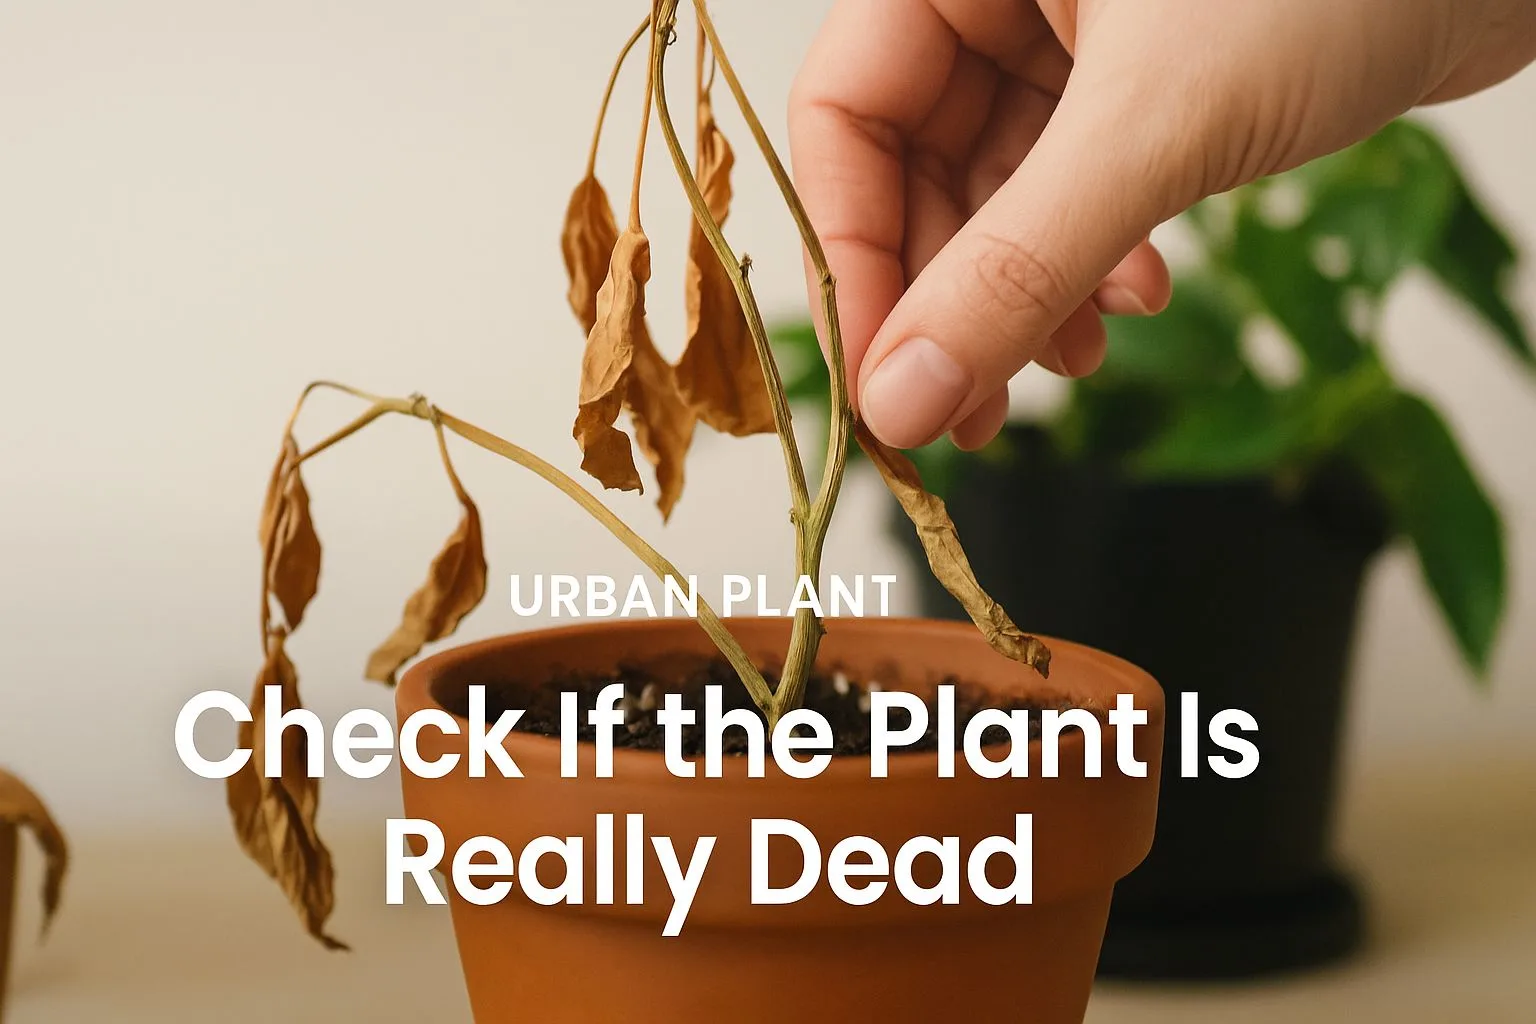
Not all hope is lost, even if your plant looks dead. First, inspect it closely:
1. Look at the Stems
Gently scratch a stem with your fingernail or pruning knife. If the inside shows green and feels moist, the plant is still alive internally.
As one expert says, “Any signs of green on the stem mean there’s a chance you’ll be able to bring it back to life”.
2. Check the Roots
Carefully remove the plant from its pot to examine the roots. Healthy roots are usually white or tan and firm.
If you see plump, light-colored roots with white tips, that’s a good sign.
But if the roots are squishy, dark, or smell foul, they may have rotted beyond recovery.
3. Bend Test
For outdoor or larger plants, try bending a small twig or stem. If it snaps easily and is dry inside, that section is dead. If it bends and is green inside, there’s life.
4. Evergreen vs. Deciduous
Keep in mind some plants naturally shed leaves or go dormant (especially outdoor ones).
What looks like a dead stick might just be a dormant plant that will sprout again in season.
If you find any signs of life – green cambium under the bark, some healthy roots, or new buds – the plant is worth trying to revive!
As Indian gardening articles note, often a plant that looks very dead actually has a bit of life in it and can start growing again with proper care
Step 2: Trim Off Dead Parts (Prune to Encourage New Growth)
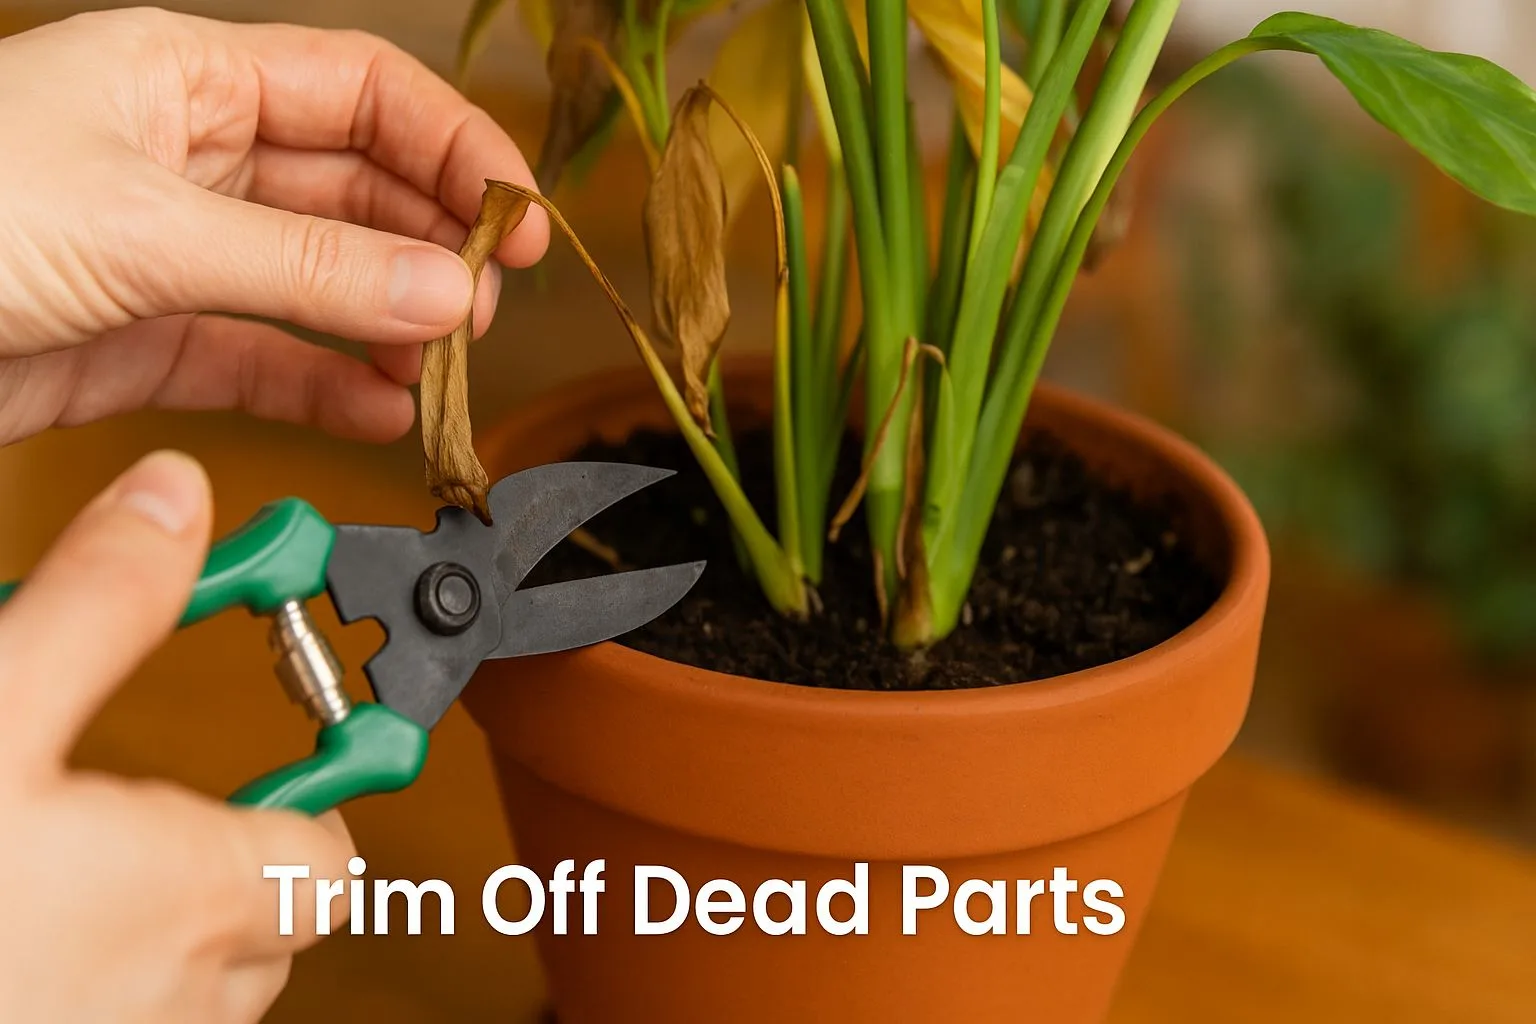
Start the rescue by pruning away the dead parts of the plant.
Removing dead material helps the plant focus its energy on healthy growth.
Here’s how to do it gently:
1. Remove Dead Leaves
Clip away all completely brown, dried leaves.
If a leaf is yellowed or mostly dead, it’s best to remove it as it won’t turn green again.
Don’t worry – removing dead leaves frees the plant to direct nutrients to new leaves.
As a gardening pro quips, “If leaves are completely brown, they’re not coming back; focus on new growth instead”
2. Prune Dead Stems
Cut back dry, lifeless stems. Start at the tip and snip down gradually until you reach inner stem tissue that’s green or moist.
Stop cutting once you see green – that’s living tissue.
New buds can sprout from just above that point. For completely dried stems where roots are alive, leave a small 4–6 cm stump above the soil
3. Use Clean Tools
Always use clean, sharp pruning shears or scissors. Sterilize them with rubbing alcohol to avoid spreading any disease.
Trim at an angle to allow water to run off the cut.
Pruning can feel drastic, but it often sparks new growth. When you cut away dead foliage, the plant can “reset” and channel its resources to growing fresh shoots and leaves.
Gardeners often observe that new stems easily grow from trimmed ones on a recovering plant
Read More Gardening Tips
10 Must-Have Monsoon Plants for Your Balcony & Terrace Garden
10 Powerful Vastu Plants For Terrace Garden To Attract Wealth And Peace
Step 3: Watering Wisdom – Revive by Correcting Thirst or Drowning
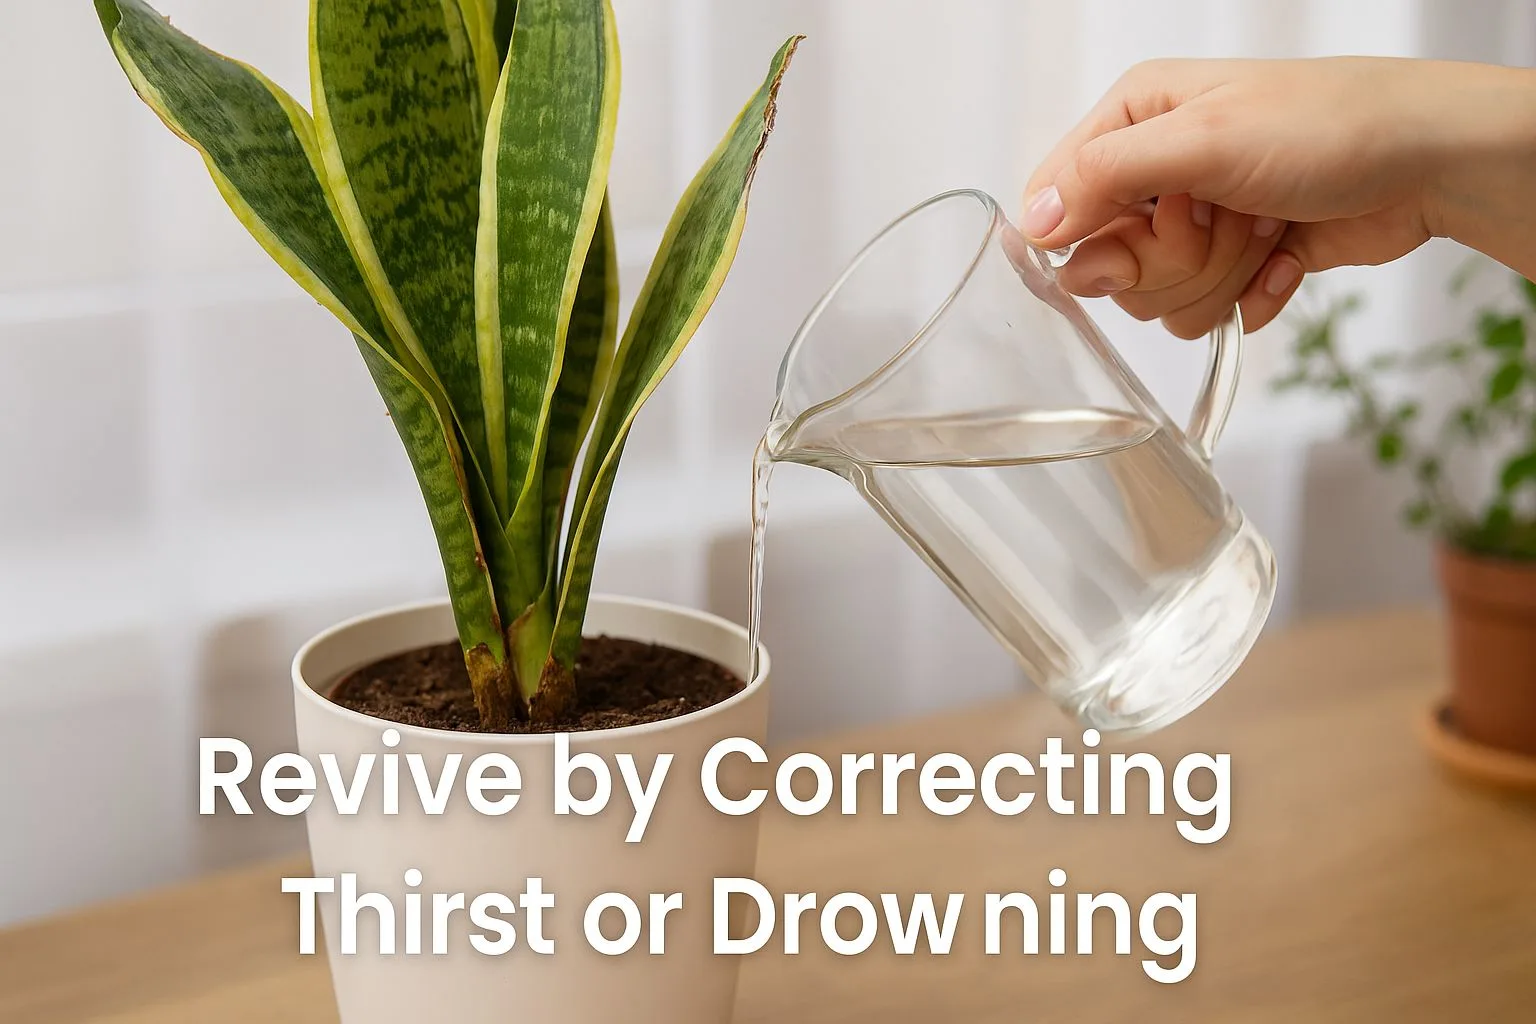
Water issues are a top cause of plant distress. Fortunately, they’re also straightforward to fix once identified.
Depending on whether your plant was too dry or too wet, take these steps:
1. For Underwatered, Thirsty Plants
If the soil is bone-dry, shrunken from the pot edges, or you see curled, crispy brown leaf edges, your plant is parched. Give it a good drink immediately.
2. For Overwatered, Soggy Plants
If the soil is constantly wet, you see yellowing leaves (especially the lower ones) that are limp, or there’s mold on soil or stems, you likely overwatered.
Overwatering literally drowns the roots (they need oxygen) and leads to rot. Here’s how to save an overwatered plant:
3. Key watering rule
Always check soil moisture before watering. Insert your finger about an inch into the soil – if it feels dry at that depth, water the plant; if it’s still moist, wait a day or two.
Step 4: Fix the Lighting (Find the Right Balance)

Light is food for plants – without enough light, a plant slowly “starves” and with too much intense light, it burns.
To revive a struggling plant, make sure it’s getting the right amount of light:
1. Increase Light for Pale, Leggy Plants
If your plant has small, pale leaves or stretched-out, spindly growth, it probably needs more light.
Move it closer to a window or a brighter spot (morning sun or bright indirect light is ideal for most).
2. Reduce Harsh Light for Scorched Plants
Some indoor plants (like ferns or snake plants) get leaf burn if placed in direct hot sunlight.
Signs include brown, crispy patches or bleached-looking leaves on the side facing the sun. If you see this, move the plant to a spot with indirect light or partial shade.
For balcony or terrace gardeners in India’s summer, consider using a sheer curtain or shade net to diffuse the sunlight.
3. Rotate the Plant
If one side of your plant is bare or bending towards light, start rotating the pot a quarter-turn every week.
This ensures even light distribution and helps the plant grow straight and full.
4. Clean Dusty Leaves
Dust can block light – especially in Indian cities where indoor dust settles quickly.
Gently wipe the leaves with a damp cloth to remove dust and allow the plant to soak in maximum light.
Step 5: Refresh the Soil and Roots (Repotting for a Second Chance)
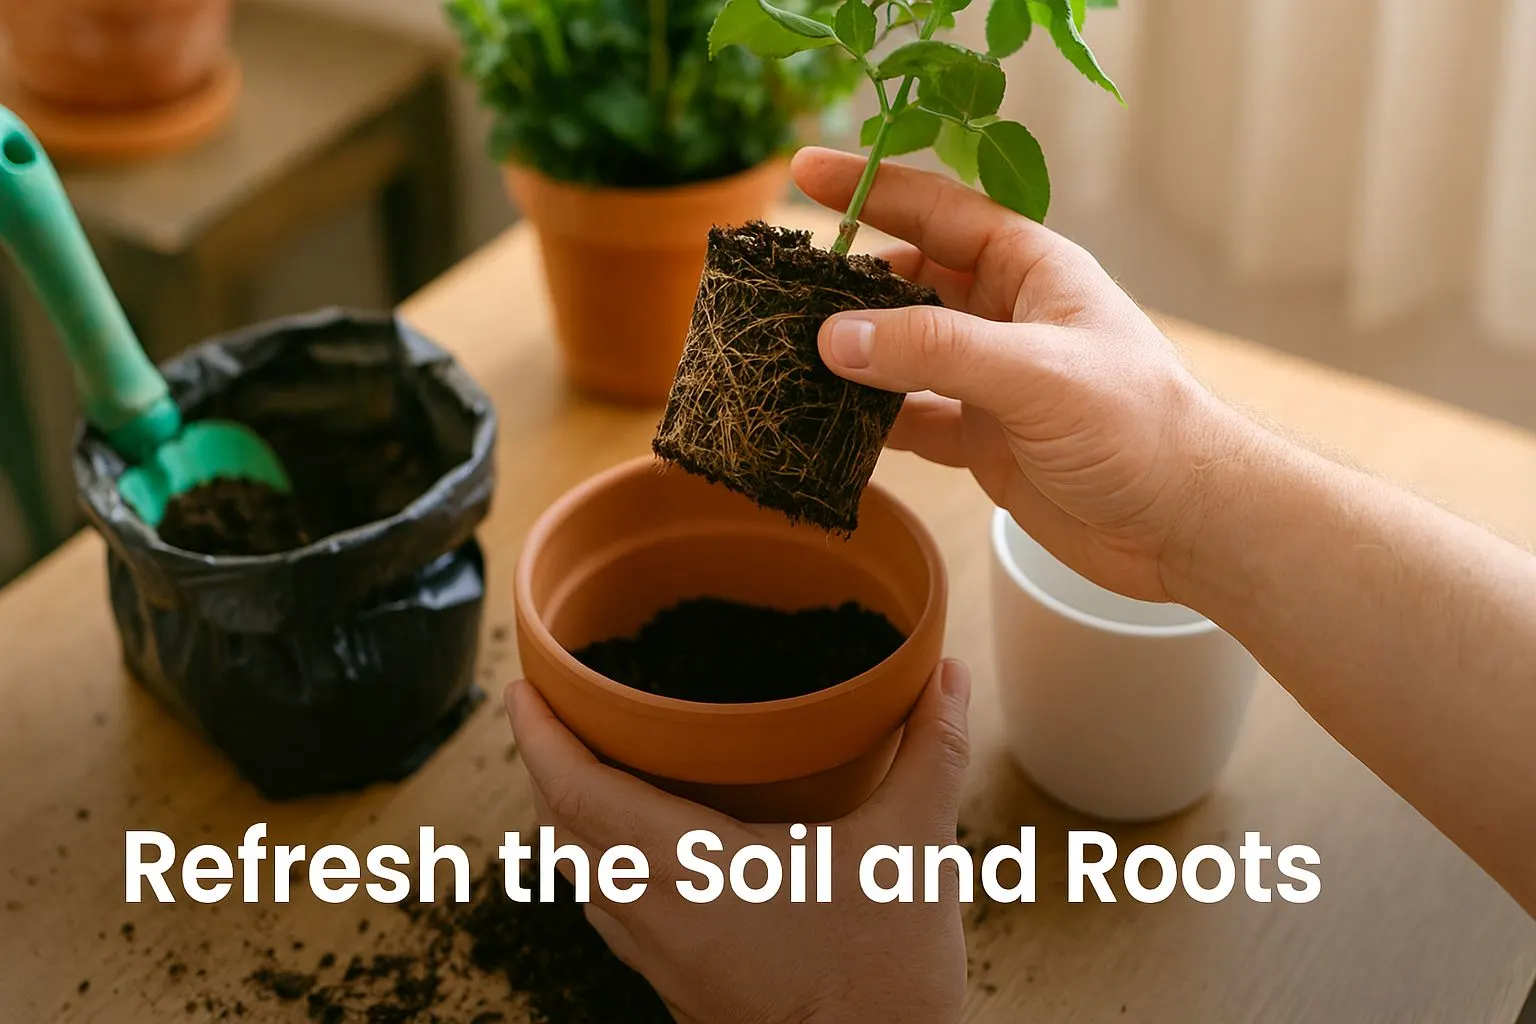
If your plant’s soil is old, compacted, or the roots are overcrowded, giving it fresh soil and a bigger home can dramatically revive it.
Terrace and balcony gardeners will attest that repotting can turn a sad plant into a happy one. Here’s what to do:
1. Check if Root-Bound
Gently slide the plant out of its pot and inspect the roots. Are they circling around and tightly packed, with very little soil left?
That’s a root-bound plant. It often wilts quickly after watering and stops growing.
2. Choose the Right Pot
Pick a pot 1–2 sizes larger (for example, from a 6-inch to an 8-inch diameter pot). Ensure it has drainage holes. Proper drainage is non-negotiable to prevent future rot.
3. Use Fresh Potting Mix
Don’t reuse the old depleted soil. Use a quality potting mix suited for your plant type.
You can mix garden soil with compost and cocopeat for a DIY mix, or use ready potting soil.
Adding a bit of organic manure or vermicompost provides a nutrient boost.
4. Repot Gently
Place some soil in the new pot, set the plant in, and fill around with fresh mix. Firm it lightly and water it to settle.
Make sure the root crown (where stem meets root) is at the same level with the soil as before (not buried too deep).
Repotting essentially gives the plant a fresh start. Think of it as moving to a spacious new home with ample food. Often, within weeks of repotting, a struggling plant will grow new roots and sprout vibrant leaves.
Step 6: Feed and Nourish (But Carefully!)
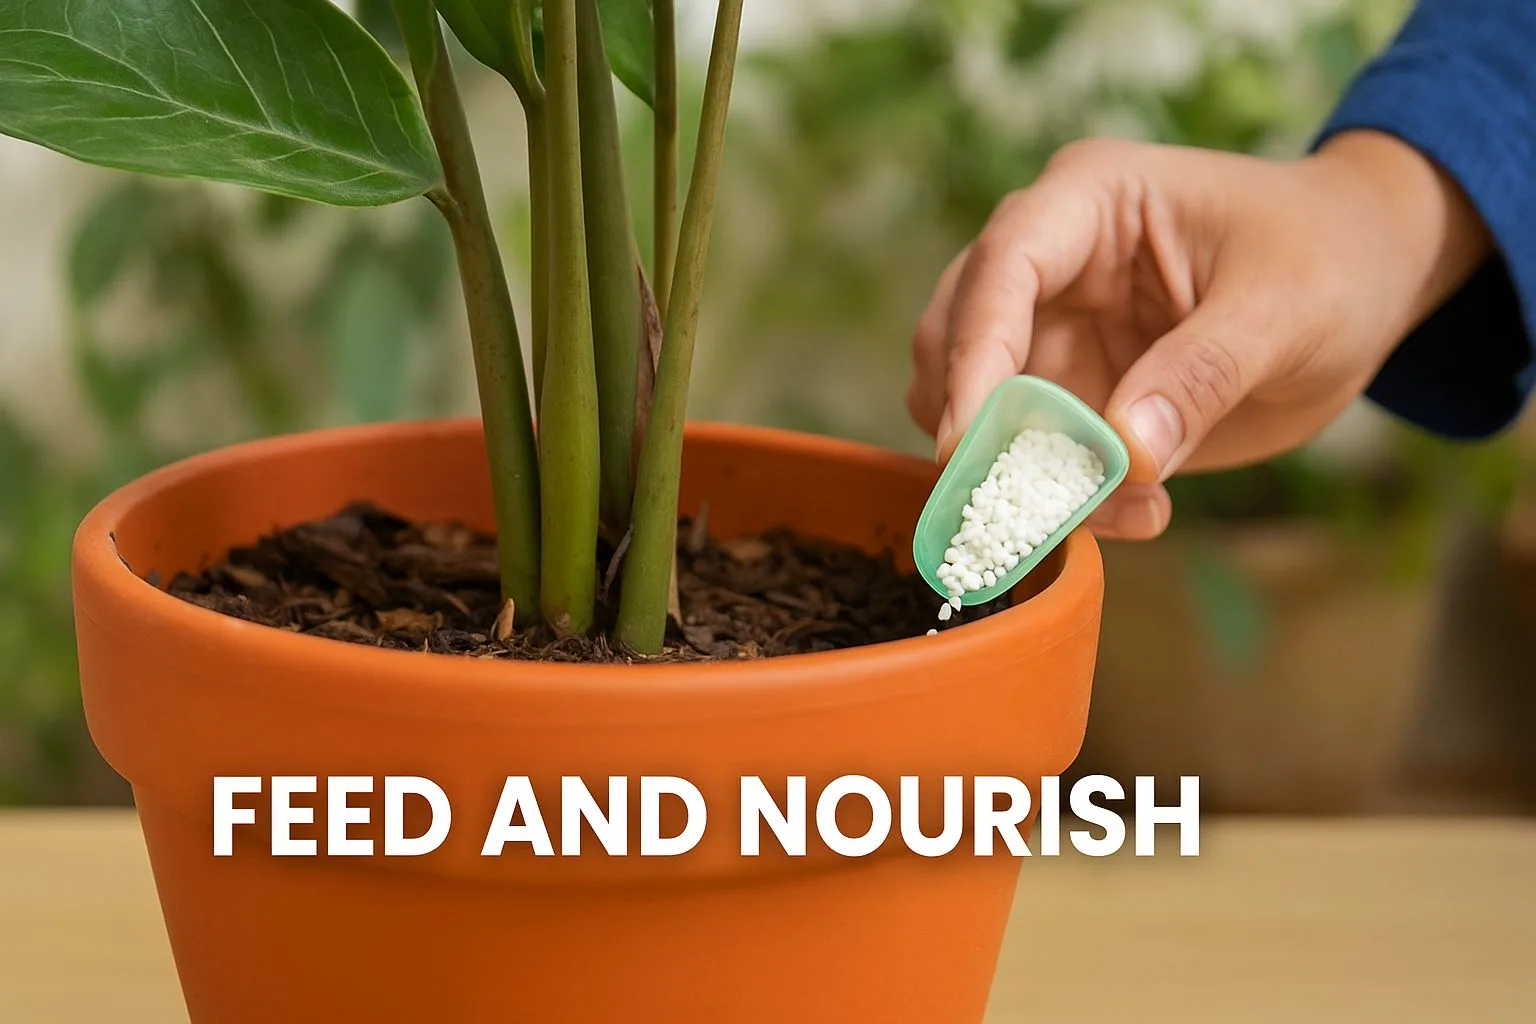
Plants, like us, need food – in their case, nutrients from the soil. If a plant has been “dying” due to malnutrition or after a stressful event, the right nutrients can bring it back to life.
However, timing and type of feeding are important:
1. Wait Until Stabilized
If your plant is extremely weak or has damaged roots (from rot or transplant), do not fertilize immediately.
Giving fertilizer to a severely stressed plant can do more harm than good.
Wait until it shows some signs of recovery (new leaves or firming up) before feeding.
2. Use Gentle, Organic Fertilizers
Once the plant is on the mend, start with a mild feed. Organic options like vermicompost, compost, or diluted cow manure are excellent for a gentle nutrient boost.
These won’t burn the roots and improve soil health.
You can mix a handful of vermicompost into the topsoil or use an organic liquid fertilizer at half-strength.
(Products such as Urban Plant’s organic fertilizers – e.g. Cow Manure or Liquid Fertiliser – are great choices for an easy nutrient boost
3. Special Nutrient Needs
If the plant had a specific deficiency (e.g., yellow leaves from lack of iron or magnesium), use a targeted supplement or a micronutrient spray.
But for most revival cases, a good compost or all-purpose feed works.
Nourishing the plant gives it the building blocks to rebuild. Think of a wilting plant like a tired person – after water (hydration), it also needs some food to regain strength.
By feeding carefully, you’ll see stronger stems and greener leaves emerging, confirming that your revival mission is successful.
Step 7: Tackle Pests and Diseases (Natural Remedies to the Rescue)
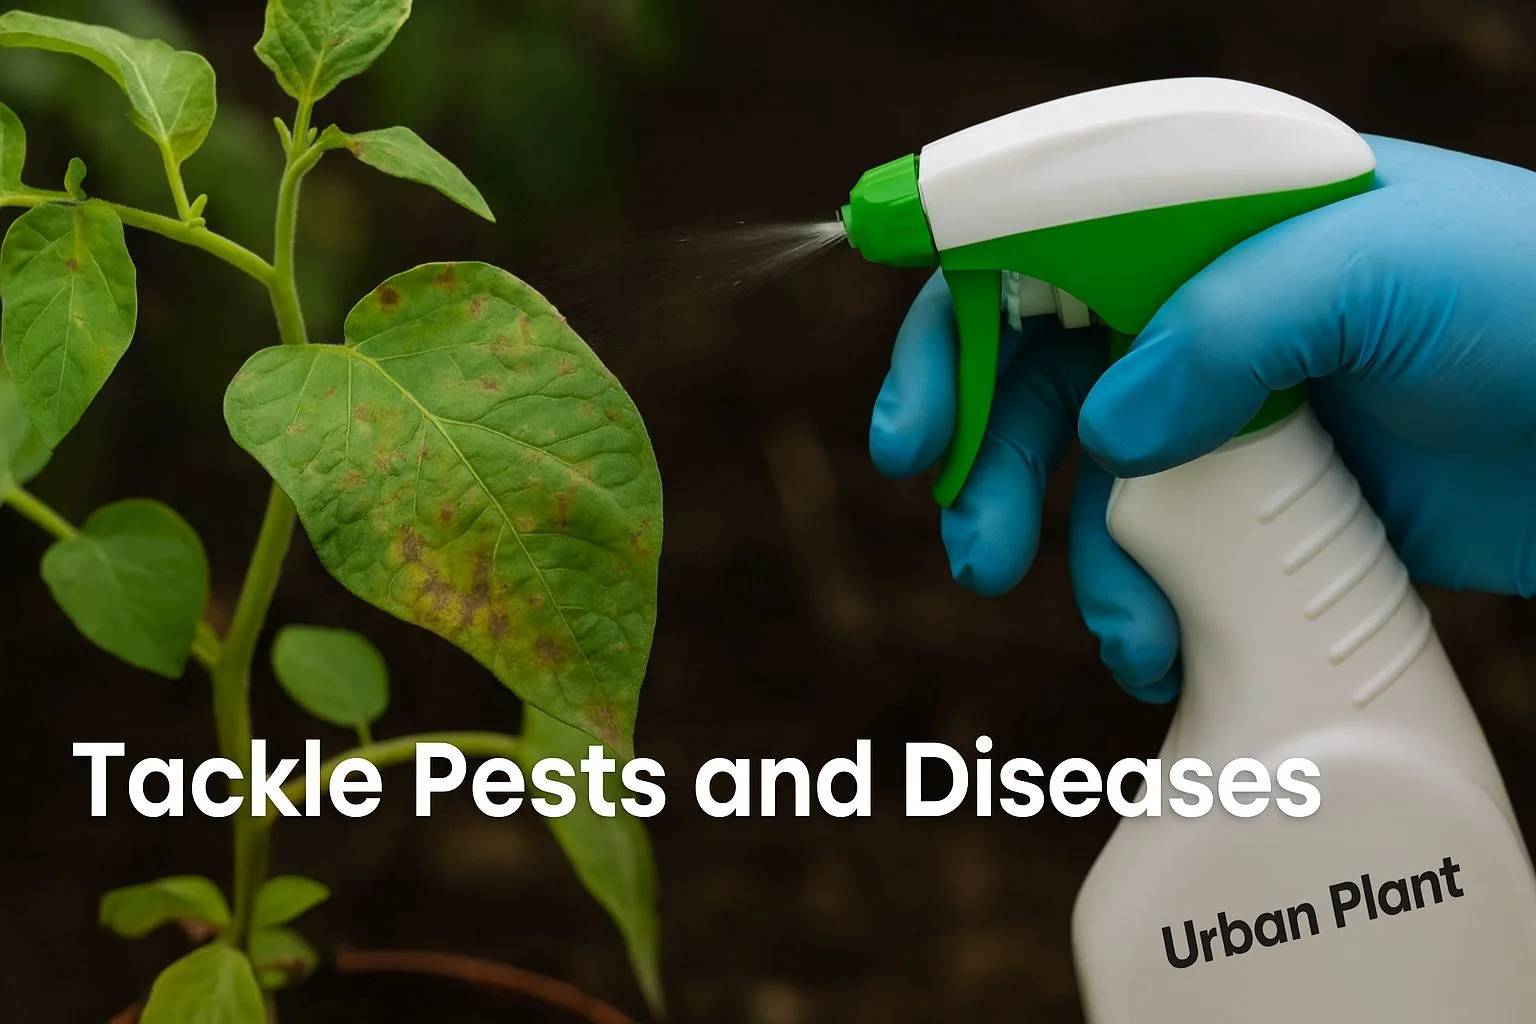
If pests or diseases are part of your plant’s problems, you’ll need to treat them so the plant can fully recover.
Here’s a simple, eco-friendly approach to protect your dying plant from pests and infections:
1. Inspect All Plant Parts
Look under leaves, along stems, and in the soil top for signs of pests. Common indoor
- culprits include: Aphids or Mealybugs: small green/white fuzzy bugs on new growth.
- Spider Mites: fine webs under leaves and tiny red/brown dots.
- Fungus Gnats: little black flies (their larvae harm roots in soggy soil).
- Scale Insects: brown bumps on stems or leaves.
- If you see these or holes/chewed leaves, that confirms pest damage
2. Isolate the Plant
Immediately move the affected plant away from your other healthy plants to prevent spread.
Especially for contagious issues (fungus or pests), quarantine is step one.
3. Fungal Diseases
If black/brown spots (blight) or powdery mildew, etc., are present, remove affected leaves.
You can treat the remainder with a homemade fungicide (baking soda solution or neem oil also works on fungi).
4. Soil Refresh
Sometimes pests like fungus gnats or soil fungus need soil treatment. Let the soil dry out a bit (to kill larvae), and consider adding a sprinkle of cinnamon (natural antifungal) to soil surface.
By using these gentle, organic pest control methods (like neem oil, which is a tried-and-true Indian gardening hack), you can eliminate the unwelcome guests without harming your plant or the environment.
Step 8: Patience and TLC – Let Your Plant Recover
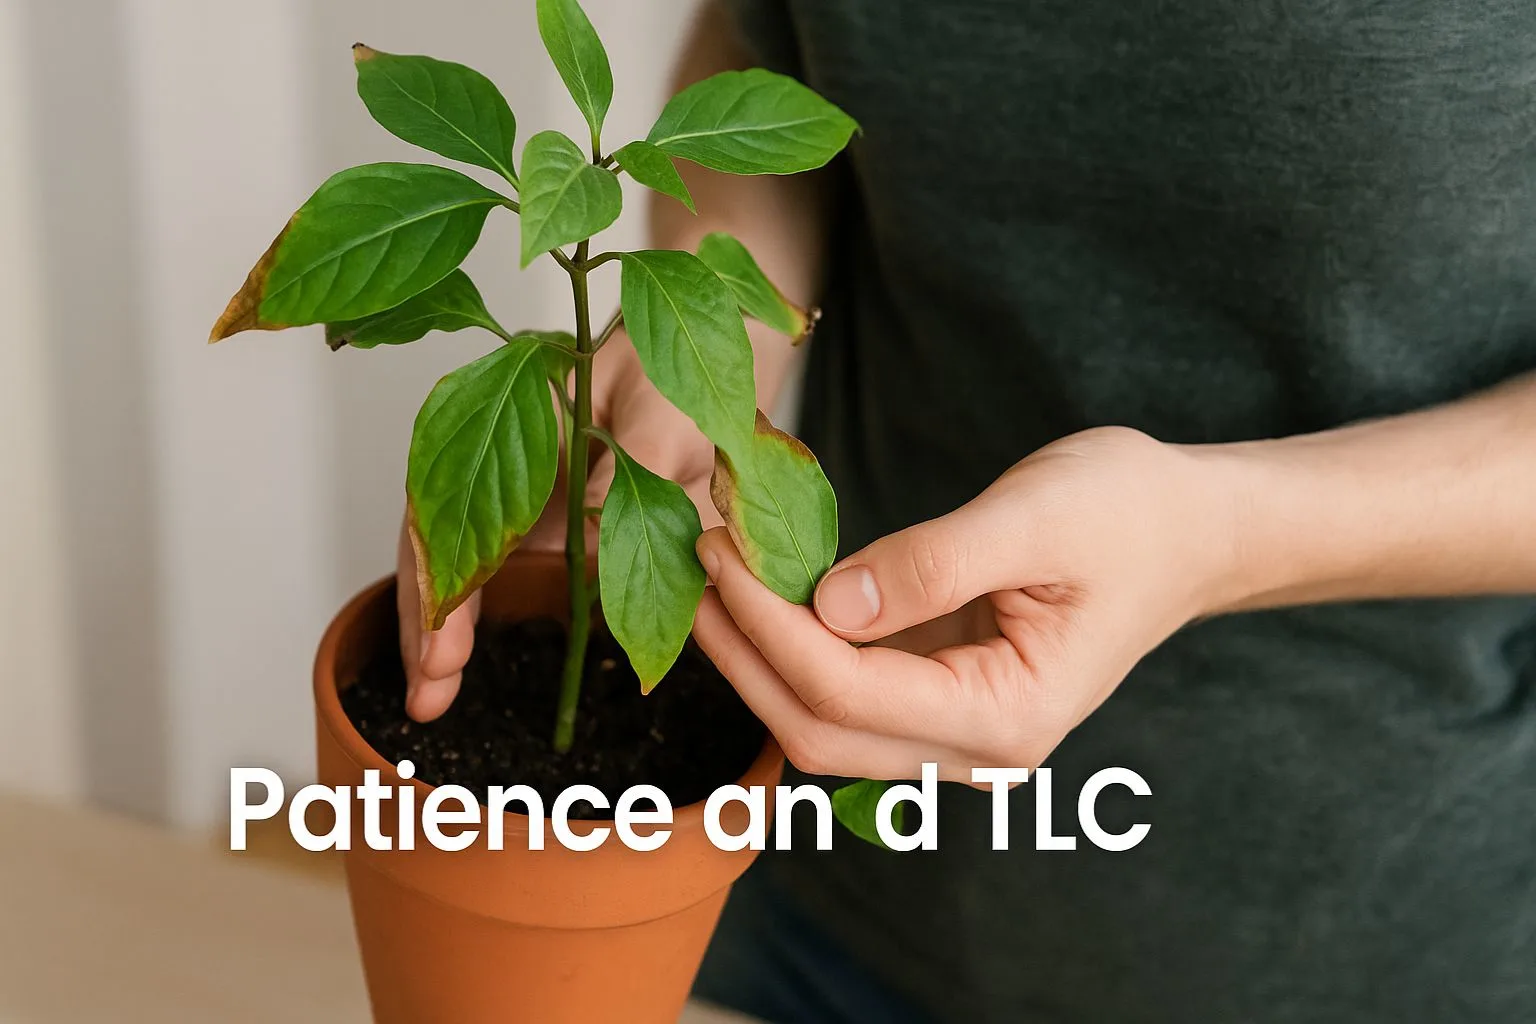
After you’ve done the rescue steps—pruning, watering adjustments, repotting, feeding, and pest control—your plant is on the road to recovery.
Now, patience and consistent care are crucial.
Here are some final tips to help your plant bounce back fully:
1. Provide a Stable Environment
Try not to move or disturb the plant too often while it’s recuperating. Keep it in a suitable spot (light and temperature-wise) and maintain a stable routine.
2. Moderation is Key
Avoid “loving it to death” with over-care. For instance, don’t keep watering daily just to show care—stick to the needed schedule.
The plant needs time to use the water and nutrients you’ve provided.
3. Watch New Growth
In the coming days and weeks, observe any new leaves or buds. New healthy growth is the best sign that your revival efforts are working!
Even tiny green shoots are a victory – celebrate them. If the plant is pushing out new leaves, continue what you’re doing.
4. Be Realistic
Sadly, not every plant can be saved. If your plant was truly dried to a crisp or rotted extensively, revival may not be possible.
But in the vast majority of cases, following these steps yields a happy ending.
If one attempt fails, don’t be disheartened – use it as a learning experience for your next gardening venture.
Finally, give yourself a pat on the back for being a caring plant parent.
As gardeners often say, there’s no greater joy than seeing a once-dying plant spring back to life!
And remember, plants are living beings – they respond to the care and positive attention you give.
Plant Symptoms & Quick Revival Fixes
| Symptom | Cause | Fix |
|---|---|---|
| Yellow leaves | Overwatering or poor soil nutrients | Reduce watering, add compost or liquid fertilizer |
| Drooping stems | Underwatering or root rot | Check roots, repot with cocopeat-rich soil |
| Brown crispy tips | Excess sunlight, low humidity | Move to shade, mist leaves regularly |
| Mushy roots | Waterlogged soil/root rot | Trim rotten roots, replant in a well-drained pot |
| Leaves dropping | Stress, pest attack | Spray neem oil, prune damaged leaves |
Natural Home Remedies to Revive Plants
- Banana Peel Water – Potassium boost for new growth.
- Neem Spray – Natural pesticide for stressed plants.
- Epsom Salt Solution – Magnesium improves leaf greenness.
- Sugar Water (Mild) – Quick energy boost for drooping plants.
- Aloe Vera Water – Heals root wounds, improves soil microbes.
- Compost Tea – Instant organic nutrition.
FAQs: Reviving Dying Plants (Quick Answers)
Can a dying plant be saved?
Yes, a dying plant can often be revived if it has any living roots or green stem tissue. With proper care—like pruning, correct watering, and light—most plants bounce back.
How to revive a dying indoor plant naturally?
To revive your dying indoor plant, trim dead leaves, repot with fresh soil, adjust lighting, and water properly. Use natural remedies like neem oil and compost to avoid chemicals.
What are the signs a plant can still be revived?
Green stems under the bark, firm white roots, and new buds or shoots indicate the plant is still alive and can be revived with proper care.
How do I fix a plant dying from overwatering?
Stop watering immediately, allow the soil to dry, and repot the plant in well-draining soil. Trim any rotten roots and avoid watering until the topsoil is dry to the touch.
How often should I water a recovering plant?
Water only when the top 1–2 inches of soil feels dry. Use a moisture meter for accuracy, and avoid daily watering to prevent root rot.
How do I revive scorched plants in summer?
Move them to partial shade, water deeply, and mist leaves twice daily until recovery.
Conclusion: Bring Your Plants Back to Life
Reviving a dying plant might seem daunting, but by following these five simple steps—diagnosing, pruning, repotting, watering correctly, and adjusting environmental conditions—you can bring your beloved plants back to life.
Remember, patience and care are key. Start your revival journey today, and soon you'll enjoy the vibrant beauty of healthy, thriving plants once again!


